
Aesthetically Accurate Adaption! (FA Rail Adapter)
- Dec 6, 2018
- 6 min read
Rail Adapters for the MK23 have existed for some time now in the airsoft community, however they were available on the real steel market a good few years before we starting to see them show up on our replicas. Before the popularization and accessibility of 3D printers in the average household, you had to rely on a CNC machinist to design and manufacture a (usually expensive) rail adapter. Whilst this might still be the case and preference for a real firearm owner, who may not wish to rely on a 3D printed part to hold their even more expensive weapon-light - airsofters now have a wealth of cheaper, 3D printed options to choose from to support their replica weapon-lights.
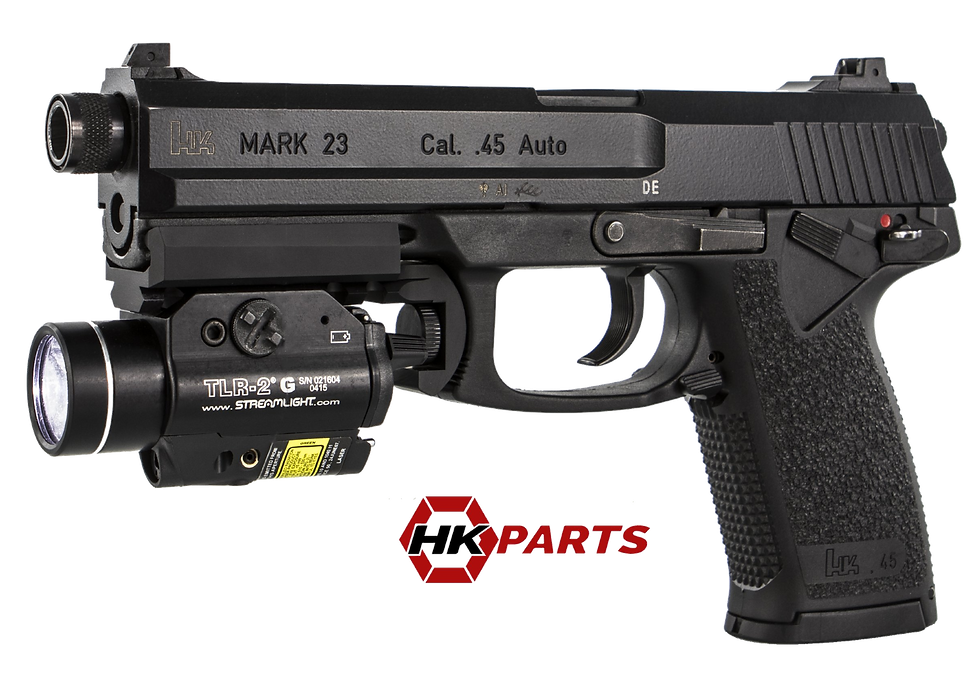
Like many accessories, the function of these rail adapters does not differ very much from product to product, but appearances are usually everything. For us at OMMK, the real steel (HK Parts) rail adapter in the image above is in our books, the "canon" and "lore accurate" version of the MK23 rail adapter. The form fitting curved trigger-guard piece with it's thumbscrew lock to thread in to the pistols trigger-guard (like the original LAM unit) makes the adapter what it is. This design choice eliminates the dead space between the rail and the trigger-guard that so many other adapters fail cater for and allows the weapon-light to be mounted as close as possible to the trigger-guard itself, which is critical for the ergonomics of using a weapon-light on a pistol this large. As good as it looks, the added security this provides is also a clear advantage.
Kidney for sale
So the bar is set, this is the benchmark, and a benchmark needs a price too. At an average of 190 USD for this CNC'd perfection, that bar is high - higher than most MK23 owning Airsofters are likely to go. So what's the alternative? Unsightly, but functional 3D printed adapters? Yes - until now...

Foundry Airsoft (FA) should be no strangers to you by now, their work on their MK23 3D printed carbine kits is unmatched and well received in the community, so when we they presented us with the image above several months ago, the hype got real and we started adjusting thumbscrews in anticipation whenever we came across them.
Forward to a week ago, we ended up getting our hands on the printed part!
As you'll see in the images below, the transmutation from 3D image to a tangible MK23 upgrade part is spot on and at a first glance (although our test item had some superficial blemishes around the bolt hole), it's already sitting pretty close to our benchmark.


The adapter itself comes in two parts, secured through very thin hex screw that locks the trigger-guard section and the rail together. You might immediately wonder why the whole adapter could not just be printed as one part, however the the reason for that will be made clear later on in the article. Here's how it looks straight out of the box:


Unfortunately, unlike our benchmark adapter (and to much upset of our eager thumbs), FA decided not to use a thumbscrew and opted for a knurled head hex screw. This was to reduce the amount of spaced a thumbscrew would have taken in the trigger-guard section and to increase the strength of the part against wear that plastic is more likely to succumb to over steel or aluminium. Regardless, the hex screw serves its purpose well and is nicely concealed in the the plastic housing.
Just like the real thing
So by now, you're wondering, how does it fit, is it easy to install and most importantly, how does it look on the gun itself? It fits great, slips on like a glove with a wrist-strap, and well, see for yourself.

Foundry have done a great job to try to match the aesthetics of the benchmark adapter, and the keen eyed among you will notice that they have even accounted for the airsoft replica having a angled front of the trigger-guard compared to the real steel MK23's curved trigger-guard front. The lazy route would have been to just do a semi-circle on the adapter and have a lot of dead vertical space between the trigger-guard and the rail. so it's a nice bit of attention to detail here.
As a minor note on detail, we noticed when installing our test sample to our Tokyo Marui MK23, that the front of the adapter jutted out slightly in-front of the slide, despite being flush against the trigger-guard (and secured via the hex screw). Interesting enough, when comparing the adapter on a Clone MK23, the adapter edge was flush with the end of the slide. We know from previous measurements, that the Clone slide is slightly longer than the TM slide, so it's possible that FA measurements for the adapter were taken using a Clone. It's something we will bring to the attention of FA regardless. We can also see that the picatinny rail itself has 5 slots for mounted devices, which should offer plenty of adjustment for differing sizes of available devices and to ensure that you keep a good and comfortable position with your activating finger when trying to interact with the device itself.
Time to get tacticool
At the time of this review, we unfortunately had limited choice of devices to attach to the rail, however we did at least have one of the more generic weapon-light styles available to show, as you can see below. We plan to join the ever increasing club of SBAL-PL owners in the near future to make up for our currently small collection!


You can see that the weapon light sits absolutely flush with the trigger-guard section, with no obstruction from the hex screw that we know is sitting inside the plastic housing. The ample availability of rail slots lets the user move the device further up front if the device comes with rear accessed flick toggles or buttons for activation without compromising on user comfort or grip. The device itself installs on the rail securely without any wobble and we personally had no concern of the plastic becoming damaged as we tightened the device to the rail.
Speaking of installation, it's time to talk about that trigger-guard hex screw we mentioned earlier, and why the adapter came in two pieces. First let's inspect the hex screw area.


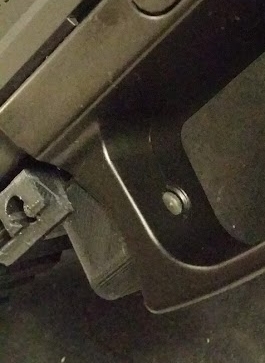
As you can see in the images above, the hex screw simply threads through the existing threading in the trigger-guard used to mount and secure the LAM unit supplied with the Tokyo Marui version. The screw does not enter the inside of the trigger-guard, so theres no worry of it catching your fingers or gloves, nor does it sit outside of the housing on the screw head side to interfere with the device.
With that hex screw fastened, you're free to install your device to the rail... but you'll quickly notice that the hex screw loses it's freedom and becomes inaccessible whilst the device is mounted. So here's where FA have thought ahead and opted to save you some trouble having to remove your weapon light just to remove the rail. By unscrewing the smaller hex screw you saw in the disassembly photos, you can separate the two halves of the adapter and simply slide off the railed section, with the device attached whilst the trigger-guard section stays put (or can be accessed for removal). It's a neat idea and we suspect it plays a larger part in future FA products yet to come.
But wait, theres more!
In summary, we feel that FA have offered us exactly what we wanted. They have delivered an aesthetically accurate and complementing design that tips it's hat at the original benchmark adapter we are so affectionate towards, and they have done so whilst still offering the functionality that Foundry Airsoft stakes it's reputation on.
As simple as an adapter like this is, it's one of the small touches that lets us appreciate our MK23's one step further without having to hide receipts from our loved ones. At an estimated retail price of 15 USD, it's in no need of an excuse... which is precisely what we'll need when Foundry Airsoft push the design a step further and make us more things like this:

But that's for another article...
You'll find the Foundry Airsoft Rail Adapter in stock shortly at the following retailers, or by contacting them for a direct order:
Thanks for reading!


Comments